Shadow mapping
There are a lot of posts about shadow mapping, but I wanted to also show a working implementation with code, that you can check out. This one will give a brief overview over the basic idea and includes the implementation using shadertoy, where you can check out the full code with comments :)
The post assumes some familarity with the OpenGL model of rendering. If there are any questions, just send me a tweet (@sibaku1).
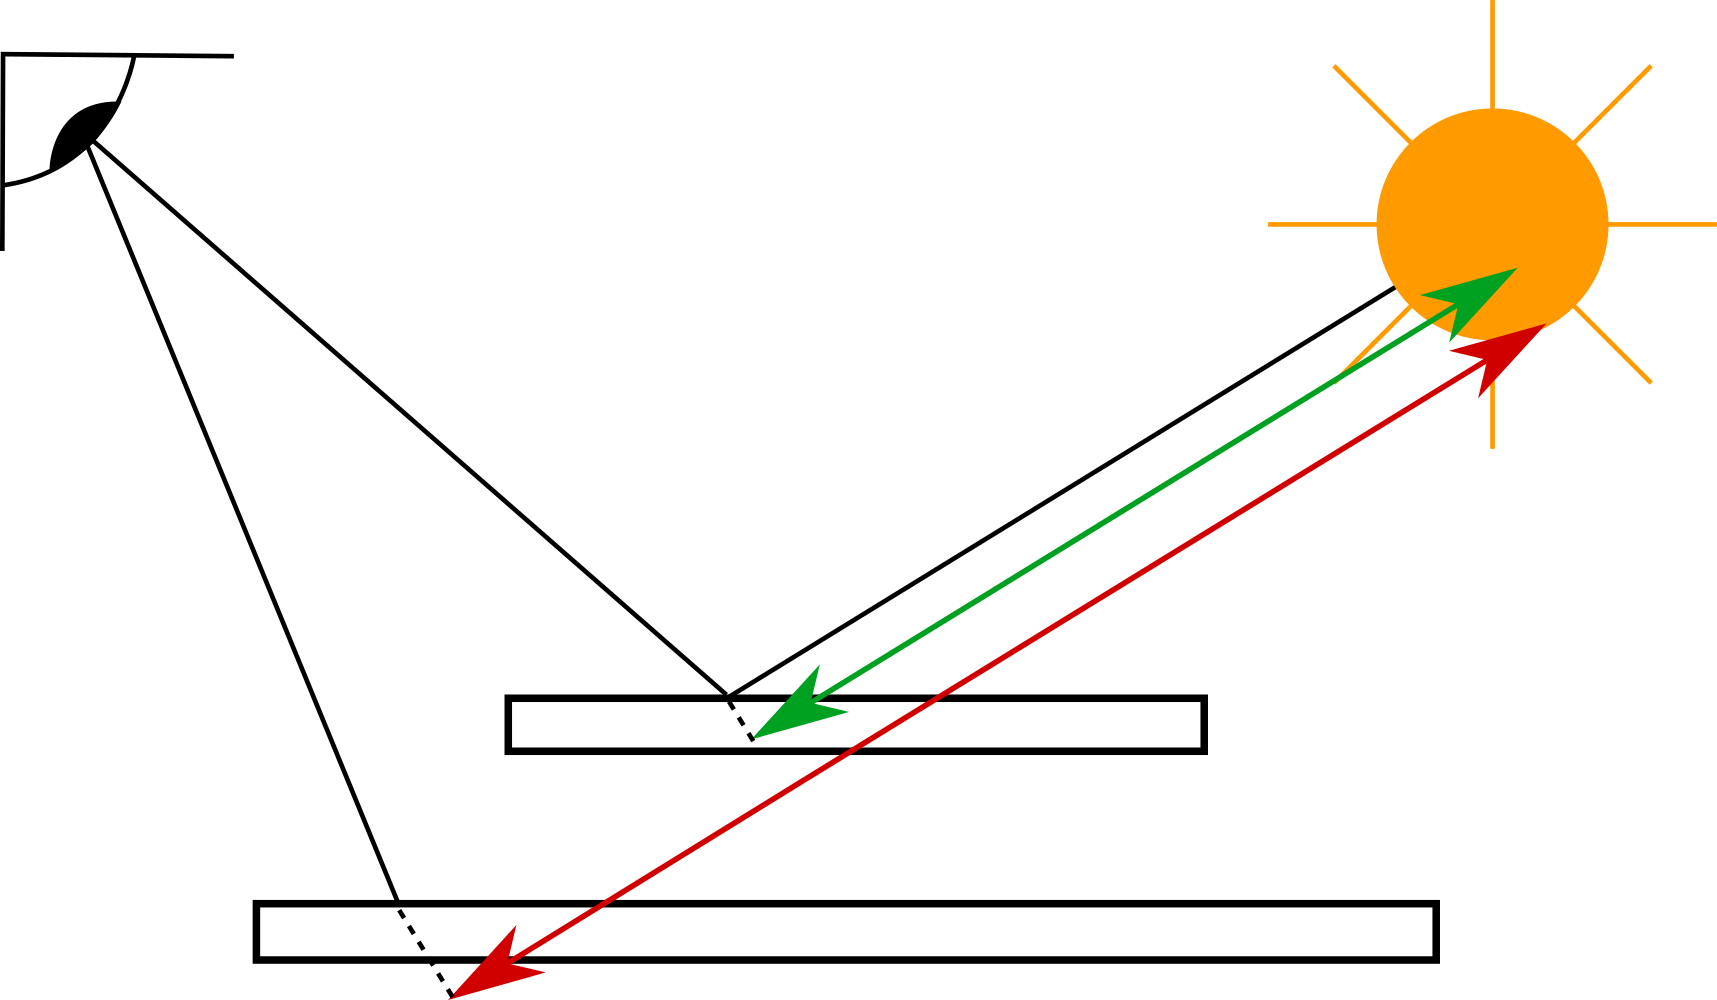
The basic idea of shadow mapping is to render the scene as seen by the camera and remember the depth (the shadow map). Afterwards render it normally and check, whether a point was occluded by checking the point’s depth in the shadow map.
So how is this done in code? First we use only spot or directional lights (pointlights need slightly more setup). Then we can use a regular perspective matrix \(\mathbf{P}\) to describe the outgoing light from the light source. The lights position and orientation in the world can be described by a view matrix \(\mathbf{V}\). We then render the models as usual with their model matrices \(\mathbf{M}\). So in the vertex stage we get the point on screen as
\[\mathbf{p}_{L,Clip} = \mathbf{PVM}\mathbf{p}\]We could just use the depth buffer, which contains the projective depth from \(0\) to \(1\) or use some other variant, for example linear or viewspace depth. These will usually require float textures or some kind of normalization to keep in \([0,1]\). The result will be rendered into a texture, the shadow map.
Next you render as usual and send the point’s position to the fragment shader. There you transform the point into the light’s system with the formula above. As we want to know, where to look in the shadow map, we have to do two more steps. First, \(\mathbf{p}_{L,Clip}\) will be in homogenous 4-space. So first we divide by the fourth coordinate to get \(\mathbf{p}_{L,NDC} = \begin{pmatrix}x\\y\\z\end{pmatrix}\). Now \(x\),\(y\) and \(z\) are in \([-1,1]\). We need to transform \(x,y,z\) to \([0,1]\), since that’s the texture coordinate’s and depth range interval. This is simply done by \(x_t = 0.5x + 0.5\). The same for \(y\) and \(z\). If you did not store projective depth, but something else, you may replace \(z\) by that value. Then we look in our texture at position \(\begin{pmatrix}x_t\\y_t\end{pmatrix}\).
We now check, if the light is occluded. If there is no occluder, the depth of our current point \(z\) should be the same as the depth rendered to the shadow map. If there is an occluder, \(z\) is greater than the value in the shadow map, as the first render pass only stores the closest fragment.
And that’s the gist of it. One thing to keep in mind is that you should sample the shadow map via linear filtering, as interpolating depth values may not make sense (think about edges of objects being blended with the background). There are a lot of variants to it. The simplest one is percentage-closer-filtering (PCF). A simple shadow mapping produces very pixelated shadows (due to shadow map resolution), which you can see in a lot of games. So the idea is to just sample a few depths from the shadow map around your point and check if they pass the test. Then divide the number of passed tests by the total number of samples. This will give a slightly nicer smoother shadow edge.
Another very nice technique is variance shadow mapping (VSM). This uses Chebyshev’s inequality to provide an upper bound for the probabilty of a fragment being in shadow. The probality can be used as a shadow value to produce nice and smooth edges. VSM also allow for linear filtering of the shadow map, as they use the expected value, which is linear. A very good writeup can be found here: GPUGems3 - Summed-Area Variance Shadow Maps
While there are a lot more (convolution shadow maps, cascaded shadow maps, exponential shadow maps, perspective shadow maps,…), these three are implemented in my simple example code.
The showcase down below shows the final image with VSM. By pressing ‘p’ while in focus, it will show PCF and pressing ‘b’ will produce basic shadow mapping. You can move the camera around by clicking, holding and moving around. You can also make the light move by pressing the ‘play’ button. If you head over to shader toy (click on the title in the render window), you can check out the complete code, with hopefully helpful comments.